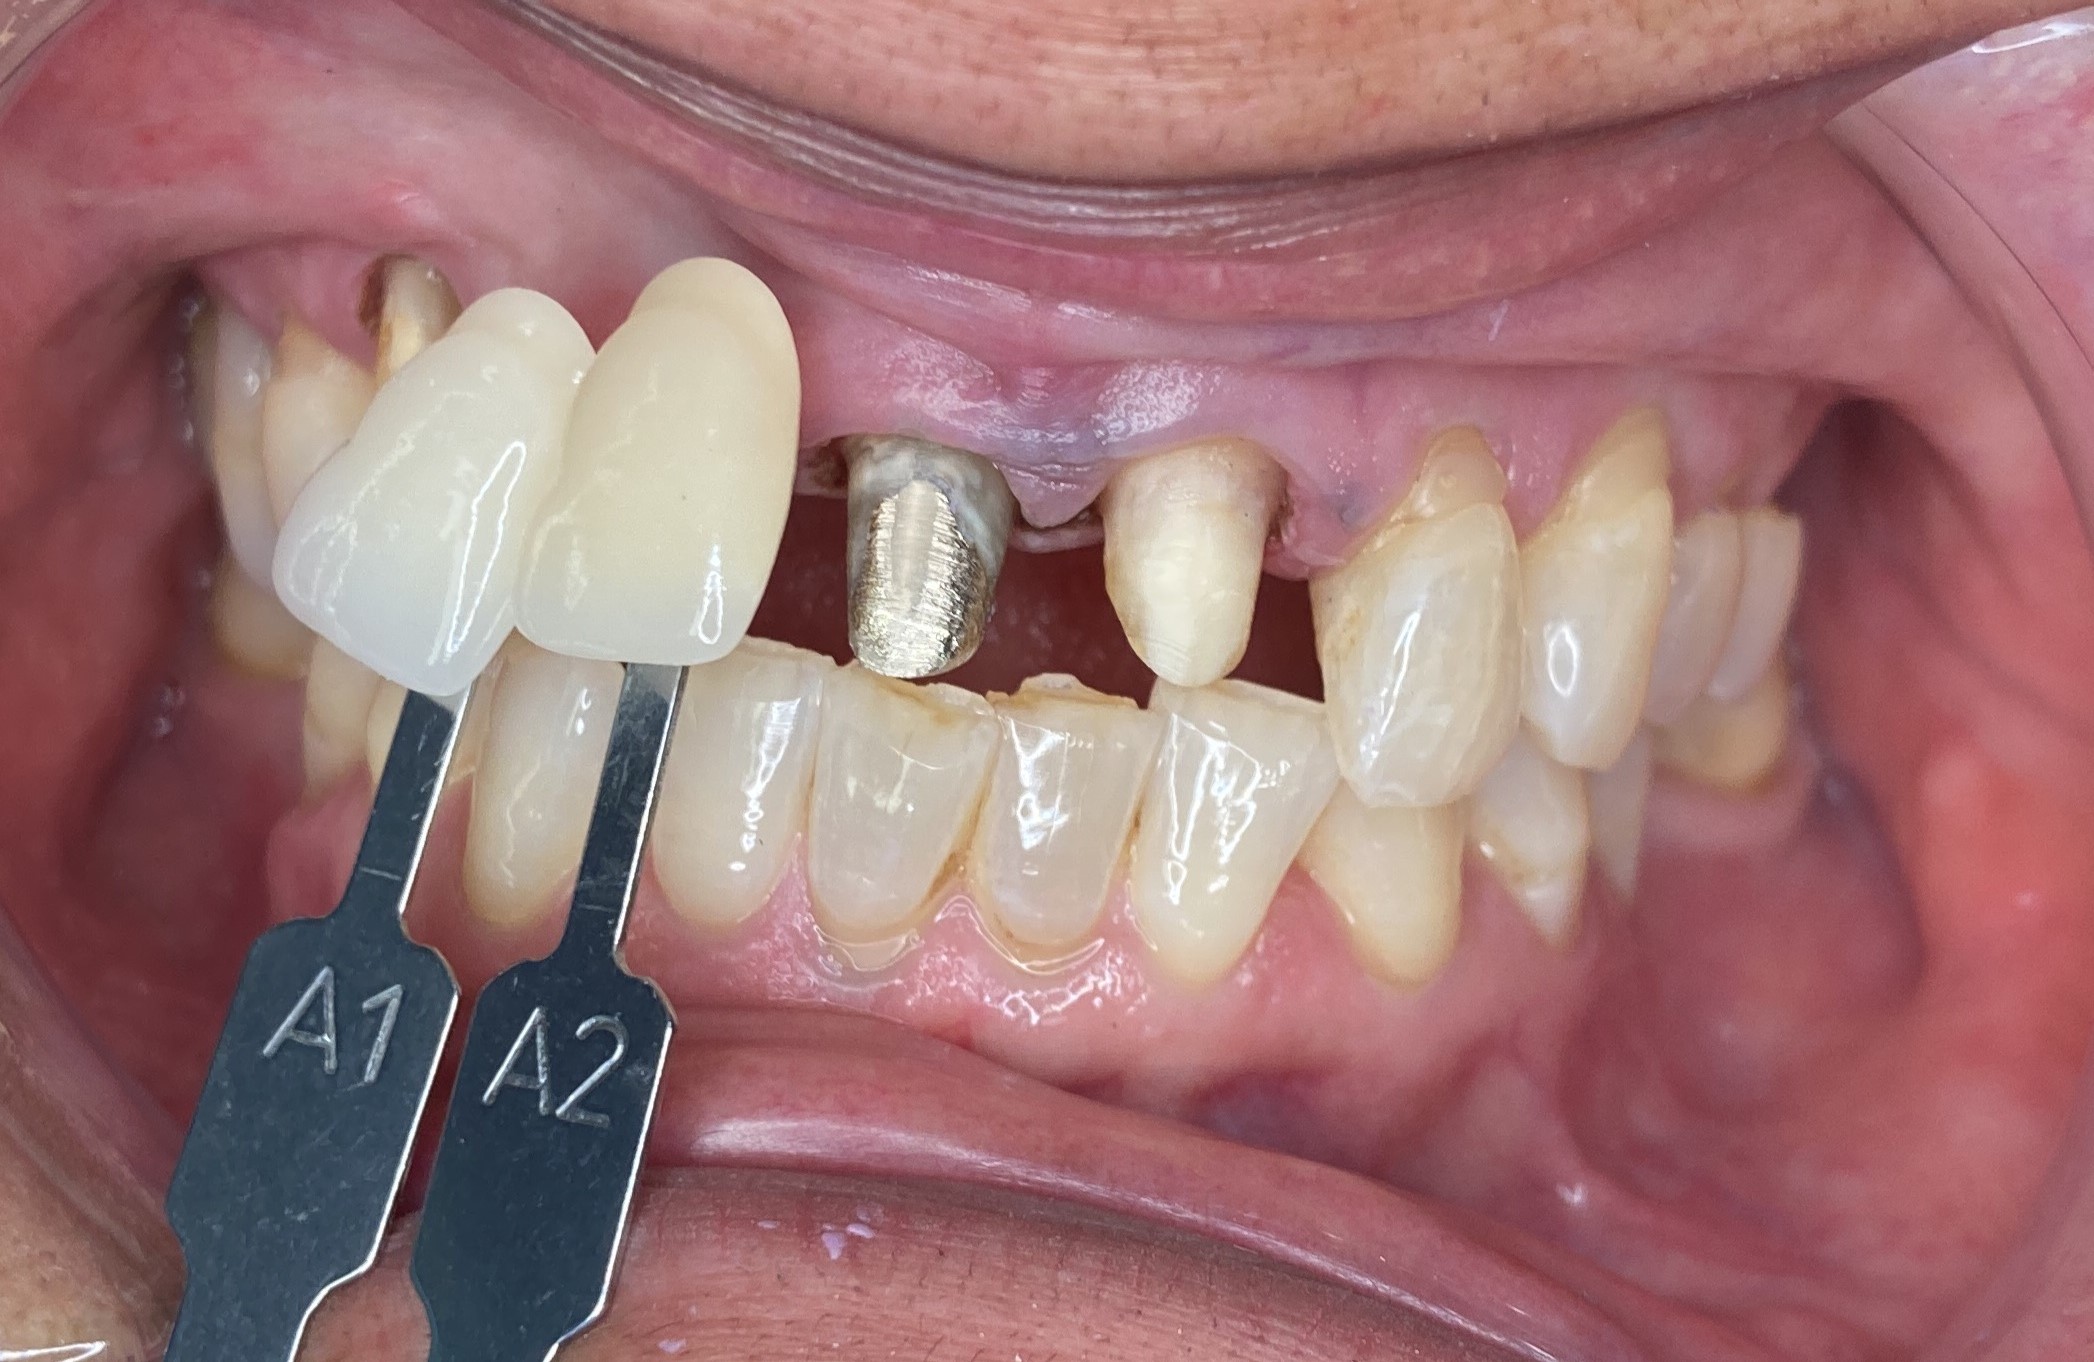
Accurate communication with us is critical for optimal cosmetic results - the first time! Below are two examples of bad communication. Out of focus on top and with the overhead light on below it. The shade tab is in the photo, however we can't read it. If these are the only photos we receive, the patient will need to come back to retake them or we have to rely on the written descriptions. For anterior teeth, remake requests for cases with only written shade information are typically at the clients expense if the desciption was incorrect or incomplete.
The following process yields the most accurate shade matching in the office. 1. Select the shade at the start of the appointment before the tooth dehydrates during treatment. Desiccation affects value, chroma, and translucency of the tooth. 2. Turn off the unit’s light!!! 3. Use natural light with the chair facing a window, if possible. Light quality is the most influental factor in incorrect shade selection. 4. View the tooth at eye level standing 10–14 inches away. Moisten both the teeth and the shade tab. 5. Hold the shade tab(s) with its incisal edge abutting the incisal edge of the tooth. 6. Make selections quickly. First impressions are the most accurate. 7. Before retinal fatigue sets in, choose the closest two shades. Rest your eyes by looking at a gray or pale blue surface for a few seconds. Then look back at the tooth, and pick from the first two shades selected. 8. If the tooth (or teeth) you are matching has charactoristics that are different than the shade tab make clear notes that reflect this. For example if the incisal edge has the same shade as the incisal edge of the shade tab, but the cervical area is a c0mpletely different shade, this can be called out in the description. It is not uncommon to call out three seperate shades for a restoration. 9. Florosis, craze lines, and staining should be called out as well. (Ideally we receive photographs for these cases!) 10. Finally, have more than one person assist with shade selection. Consider letting the patient participate in the process, and document their choice in the record.
Photographs - cameras and lights
Good photographs are the key to high quality cosmentic restorations. Anything from a smartphone with good lighting to dedicated dental cameras can be used. The best results require good lighting. ideally with color calibrated flash. To achieve this smart phones can be attached to a flash for dental photography. Better still are cameras designed specifically for this application.
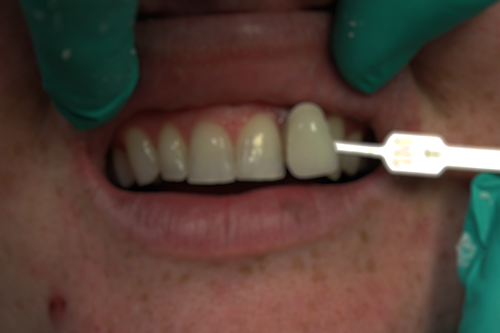
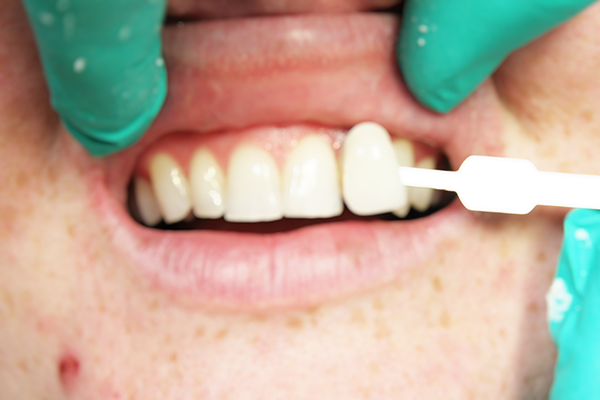
Good photographs follow the shade matching steps listed above plus: 1. Make sure that the value of the shade tab is in the photo. 2. Make sure that the shade tab is on the tooth to be restored or an adjacent tooth and that incisal edges of the shade tab and teeth are next to each other. 3. Two tabs are better than one! Either both in the same photo, or two seperate photos.
Better Photos! Side View
Adding side view photos helps to illustrate the texture and luster of the tooth surface. These are almost impossible to see with a straight on photo. This allows us to provide more life-like restorations. Aside angle photo will also help determine the length of the contact by allowing the ceramist to view the interproximal tissue. If the tissue is low in the interproximal, the contact needs to be longer to avoid a dark triangle. If the tissue is full in the interproximal, the contact will be shorter to avoid smothering the tissue.
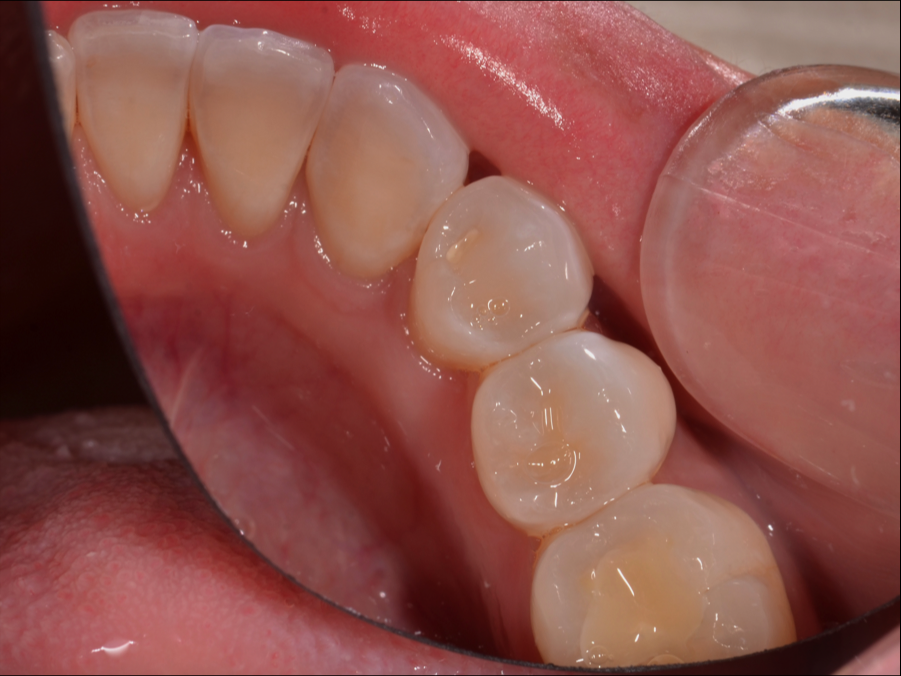
Even Better Photos! Occlusal View
This photo illustrates occlusal stain, anatomy or characteristics that may or may not be desired in final outcome. ALWAYS communicate any matching instructions on RX.
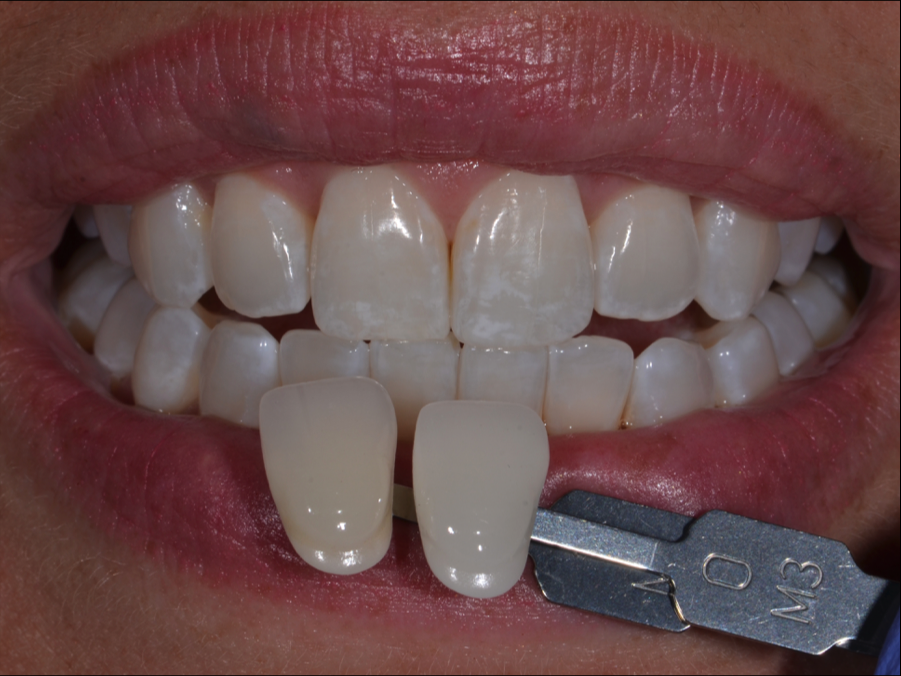
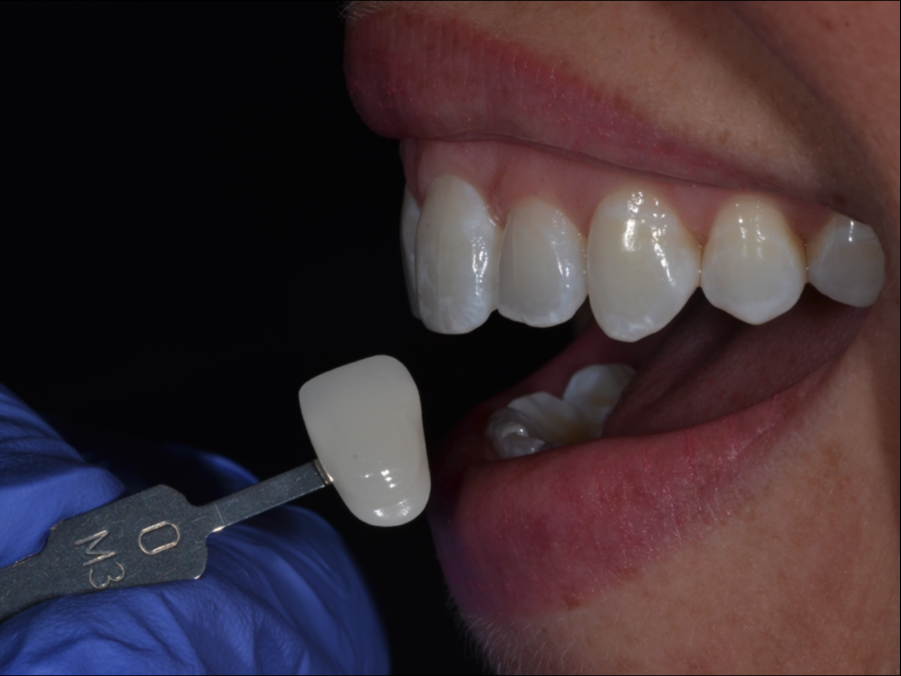
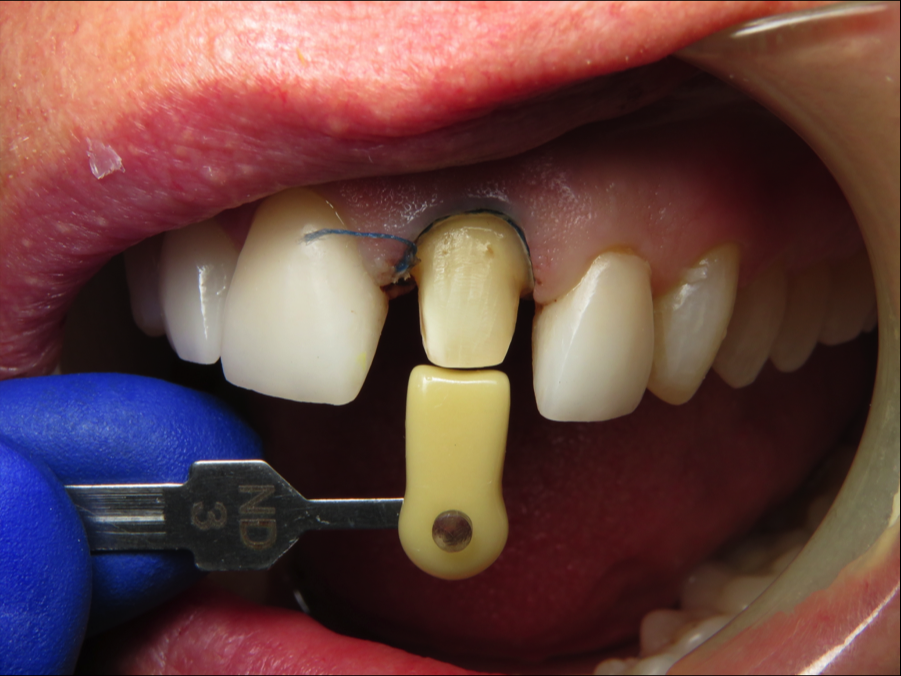
Complete Photos! Dentin Shades
Zirconia and lithium disilicate (E.max) anterior restorations ideally include a shade photo of the re-hydrated dentin. This is critical in choosing the correct material for dark stumps with tetracycline discoloration or metal posts. The dentin guide that is most popular is the (Natural Die Material guide) from Ivoclar. Find the shade tab that is the closest match to the hydrated dentin and take your photo from the distance shown above. The closest dentin tab may not be a perfect match, but a our skilled ceramists will use this information to block the dark dentin from showing through the restoration.
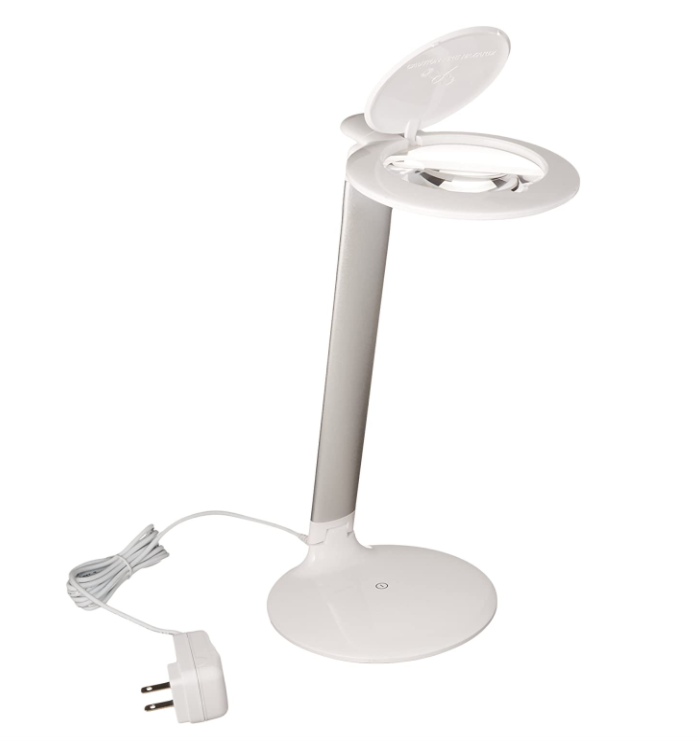
Checking restoration shades - Lighting
Checking shades for restorations requires an accurate light source. The temperature and color rendering index (CRI) is critical in choosing a good lamp. What we are looking for is a good representation of natural sunlight. We use and recommend the "Daylight Company Halo Table Magnifying Lamp". It features a 6000 K temperature and CRI of 87+. It also features a 2.5x magnifing lens. Best of all it is under $70 at Amazon.